Mayfly Winger Capes
Many people ask "what is the best feather to use for tying wings on my dry flies?"
Years ago, tyers were able to use hen necks or even the larger feathers off the bottom end of an old rooster cape. However, with hackle growers breeding for smaller and smaller hackle sizes, today these feathers are too narrow and "dry-fly" like.
Well, here are two alternatives that work well; mayfly winger capes and winger patches.
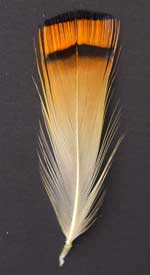
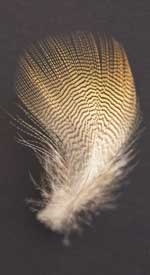
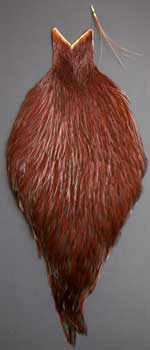
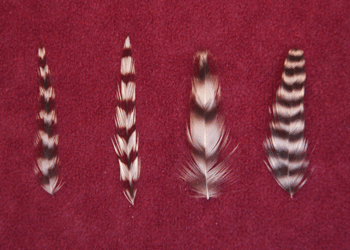
Feathers from: hen cape, rooster cape, winger cape. and winger patch
Tips for Tying with Mayfly Winger Capes
 Capes
Capes
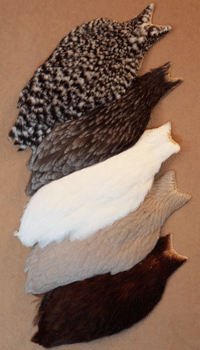
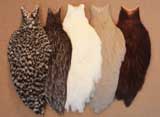
These capes are from hens specifically grown for neck feathers that are wide and webby, and yet small enough to make a nice wing on a dry fly. The birds are quite a bit smaller than the saltwater hen line and an emphasis is placed on selecting more natural colors.
This line is heavey in different shades of dunn and grizzlies. However, as you can see in the picture, the barring on the grizzly feathers is a bit thick and "muddy". When tying smaller patterns, you can only see one or two bars on the feather.
 Patches
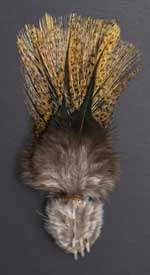
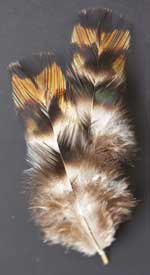
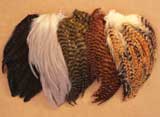
These feather patches have some of the finest feathers for tying wings on a fly. The barring is clean and tight, the tips are nicely rounded, and the webbing extends right to the edge of the feather.
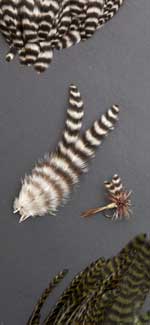
Check out the picture on the upper right. The wings on the fly on the top were tied using feathers from a hen cape. They are far too pointy and barely visable through the collar. The one on the bottom was tyed using feathers from a grizzly saddle patch. The sillouette is perfect.
| Winger Feathers | ||||||||||||||||||||||||||||||||||||||||||||||||||||||||||||||||
 |
||||||||||||||||||||||||||||||||||||||||||||||||||||||||||||||||
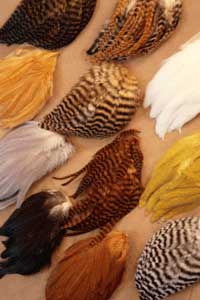
These patches come in narrow, medium, wide feather size. The picture on the right shows the range in sizes. Click on a thumbnail below to see an enlarged view.
*Please include a list of the colors you would like in the "PayPal notes section" when checking out - that or just send me an email!
I'm looking for pictures of flies and the recipies you used to tie them. Please give me a call or email me for more information. Thanks!
|
||||||||||||||||||||||||||||||||||||||||||||||||||||||||||||||||
Tying Perfect Wings on Your Dry Flies
by Dennis Potter
Whiting Farms Pro Team
Winger Feathers
Last year Dave Roberts introduced me to Winger Feathers; little skin patches that had a good number of feathers that are great for tying feather wings like on the venerable Adams. I tried them and loved them. Each feather is well rounded and wide, offering a wonderful wing outline.
Mounting the “wings” has always been the stumbling block in producing the perfect Adams type fly. Here are some tips to get you over the hump.
Typically, the tier matches a pair of feathers with similar structure, color and width. The excess barbules are stripped off the rachis (stem) to the exact length of the wing. DO NOT STRIP ALL THE BARBULES OFF THE RACHIS . When you do that, you end up trying to tie two, mostly round stems, side by side on a perfectly round hook. It is very difficult and usually frustrating. When mounted this way, as the thread tightens to set the wings, the thread torque (friction) locks the inboard feather in place but rolls the outboard wing out of position. When the feathers are pulled back and up, and a little mound of thread is wrapped front of the feathers, invariably the outboard feather is canted off at an angle, sometimes severe. It is almost impossible to correct.
Instead, strip off 1/2 of the excess barbules if it is easier to handle the feathers.
With the thread hanging in wing position, hold the feathers with the rachis parallel to the hook shank. Lower the feathers to the hook so the stems are very close to the hook shank. YOU ARE TYING IN THE EXCESS BARBULES.
Instead of securing the feather with a “pinch loop” pulling down, start a pinch loop, take up some of the slack and form a second “pinch loop” going up. PULL UP to secure the wings in place. That maneuver gets rid of the tread torque on the outside rachis and locks both wings in place without twisting. AFTER THE SECOND “PINCH LOOP” ALL WRAPS TO THE SECURE THE WINGS ON THE HOOK MUST GO TOWARD THE REAR OF THE FLY.
Remove the feathers behind the thread. Next, bring the thread back to the base of the wings. Holding the tips of the wings, pull them up and back over the shank of the fly. The excess barbules that you tied in will spring forward. Carefully, using the fine tips of your scissors, trim those barbules back, behind the hook eye. It now takes only a few wraps of thread to stand the wings upright. Carefully divided the wings and take a few gentle wraps in between the stems. You should have perfectly set wings.
Tie 10 or 12 sets of these wings and you will get them perfect every time.
Yippee Tie One On!
Dennis Potter
Whiting Farms Pro Team
Pathological Tiers, Founder
